Bloom Where You Are Planted!!!


Couldn't you just DIE!!!? Isn't that the cutest, fluffiest bunny rabbit you've ever SEEN?!!! I love him! And all the other new High Hopes stamps.....but all the others won't be released until February 15th!!

Today you are getting a special preview of the new High Hopes Stamps because THESE ones are the February Project of the Month stamps!! Woohoooooooo! The only way to get them before the scheduled release date is to order them in the Project of the Month kit!

I also made this card for this week's High Hopes Challenge #16 brought to us by the fabulously crafty ILA!!! This week she asked us to use some Lovely Lace on our designs so I used some wonderful 'lacey ribbon' from Inque Boutique!

I stamped the *new* bunny image on Wausau bright white cardstock using Memento Tuxedo Black ink and coloured him in using my Copic markers (of course). The card base is Baja Breeze along with Pretty in Pink matting. The patterned paper is from the Shabby Chic line by Junkitz. I stamped the Bloom sentiment directly onto the dp, added the lace along with a sizzix swirly diecut in Baja Breeze and attached some fuzzy Prima Fancies flowers using glittery brads. To finish it off I pop dotted the main image and then painted some Shimmerz onto the tulip and hearts!


So head on over to the High Hopes Blog to check out the other lacey designs and also to find out more information on ordering these wonderful new POTM stamps!!!

Have a stampin' good day!!! OH and don't forget to come back tomorrow because my Birthday and Blogaversary Celebrations begin!!!

Will a Cookie Help?


I've got another preview for you today! This one is from the new sets Cookie Jar and Cookie Jar-gon by Diane Zechman. These sets are all about cookies and baking and our looooooove of cookies. I mean, who doesn't love a nice warm chocolate chip cookie, straight from the oven???

I stamped the adorable little mouse carrying his gigantic cookie and coloured him in with Copic markers. I used my Labels Nestabilities to cut out and emboss him. The card base is Pretty in Pink and the chocolate swirly heart dp is from the Bittersweet line by Basic Grey. I added some white at the bottom that I punched with a Martha Stewart lace border punch and some ribbon (can't remember where it came from). I pop dotted the main image and added some Basic Grey brads! Isn't that sentiment cute? A cookie ALWAYS helps me!!


Head over to the ATS Blog and check out more designs using these sets! Also you can find out how you could win them! Don't forget to come to the All That Scraps release party on Monday night, February 2nd where these and other sets will be released!!

Well, I'm off to work all day. Hope you have an inkier day than I will!! *sigh*

Warm and Cozy!!


There's nothing better on a cold, blustery winter day, than to be Warm and Cozy, is there?? I love being all bundled up in my 'comfy clothes', which is my work-at-home uniform of flannel pj pants and a sweatshirt!! Well, AmyR's new stamp set from CCDesigns is called just that....Warm and Cozy!

There are some awesome images and sentiments that go with this set, but my favourite is the bunny slippers!! They're so cute and fluffy! I stamped them on Wausau bright white cardstock using Memento Tuxedo Black ink and coloured them with....say it with me now....Copic markers!!!

The papers I used are from the Rainbow Sherbet collection from Stampin 'Up. The card base is Apricot Appeal with Certainly Celery for accents! I used my Pinking Circle nesties to emboss and cut out the main layers. I stamped the sentiment on Certainly Celery and added a Chatterbox button with linen thread! So sweet and simple but will hopefully make some sick person feel better! Hmmm...I wonder who's going to get sick next??


Warm and Cozy will be available on Monday, February 2nd at All That Scraps along with a couple of other great sets that I will show you over the weekend!!

Oh and here's a little known fact about Kraftin' Kimmie.....slippers actually scare me. Not kidding. The last time I wore a pair of slippers, I slipped and fell down the stairs on my back. Do I have no depth perception, am I just a klutz?? (My Mom would say, a little of both!) But, ever since then, I don't wear slippers. Aren't you glad you know that about me now?? I'm just puttin' it out there, trying to share myself with you all!! *snort*

Well, I'm off to work today....and tomorrow. Yuck.


Oh and P.S. It's only a couple more days until my week long birthday/blogaversary celebration!!!! Are ya comin'????

Brads Galore!!!


So you know that I'm a hoarder, right?? I said hoar-DER!! Sheesh, clean yer ears out!! Yes, I buy all these beautiful, yummy, sparkly things with the intentions of using them on my very next project....but then I don't. Why? Because if I use them, then I won't have them anymore. Makes total sense, right? Okay, not so much, but you know where I'm coming from, don't you?? Please tell me you do.

This week's challenge at the ATS Blog this week is to use brads. Okay, the challenge was actually to use as many brads as you can, but I say, that's just madness!! It was painful enough for me just to use these five brads of shimmery goodness! Why? Because I only have ONE package of each!!! That's why!

Aaaaaaaaaaaaaaaaanyhooooo! The cardstock is Pink Pirouette and some Soft Sky. Of course I coloured it with my Copic markers...what else? And everything else is by Imaginisce....the patterned paper, the flowers and those yummalicious brads!! Oh and I also used some Stardust Stickles on her wings.


The sketch that I used for this little card is one that was posted on Ana Wolfhart's blog for a Taylored Expressions sketch challenge! I turned it on it's side and used it this way instead. You know, I've really got to start printing out all these great sketches I find because I often find one and then can't remember where I saw it. Maybe I'll alter a little book or something to put them all in. Hmmm. Yet another job to do! *sigh*

Okey doke. Well, that's my card and my musing for the day. Did I mention that it was supposed to be my day off, but I have to go in for a meeting?? Did I mention that?? Can ya tell I'm not impressed?? Alright. Just checkin'!

Hope you have a super stamp-filled day.

A Shimmerz Tutorial!!!

I don't normally do much in the way of tutorials, because they are extremely time consuming and a LOT of work! But I was thrilled to be asked to do one for the How'd They Do That? section of the My Favorite Things forum over on SCS. So I thought I'd share it here too!

I am totally excited to share my Shimmerz Tutorial with you today because a) I LOOOOOVE Shimmerz and b) I’m debuting one of the new MFT February release stamp sets!! Heeheeee! With the MFT Lady’s permission of course!! (Actually she's away at CHA in Anaheim this week and from what I hear, she's lost her voice, so what could she really say, anyway, right??? *insert evil laugh here*)

Now anyone who knows me, knows that I love anything sparkly and shimmery and these lovely little paints definitely fit that bill! Shimmerz are non-toxic, water based paints that are ridiculously shimmery!!! And today I’m going to show you just a few of the ways you can use them!!!

The stamp set I’m giving you a peek at is another amazing creation from Stephanie Fizer and it’s called Tea for Two! I just love it! BUT you won’t be able to order it until next Wednesday, February 4th after the Release Party!! And after you see the pictures of these A-dorable images, I’m going to have to tell Kim to have plenty on hand and available on release night!!

As you may or may not know the Shimmerz come in over 35 different iridescent colours and My Favorite Things has almost all of them in stock!! They come in little pots and all you need is a paintbrush or empty aquapainter to use them! You can use Shimmerz over top of your stamped and coloured images just like paint. You can add a little shimmer to a dress, some flowers or some fur....like I’ve done!!

I stamped the images using Memento Tuxedo Black ink on Wausau bright white cardstock and coloured them with my Copic markers.


I painted each of the colours of Shimmerz that I currently have on a spare piece of white cardstock so that you can see what they look like with no colour underneath them.


I decided to use the Gold Glimmer on the mouse and bunny fur. This pic is of the mouse image after I’ve painted it. Keep in mind it’s difficult to catch the glimmer and shimmer on camera but I think you get the idea!


Next I decided to add some sparkle to my Prima flowers, so here is a before shot,


.....an after shot.....


.... and a closeup shot. The paint goes right on and dries so quickly and leaves them super shimmery!


I wanted to try Shimmerz on my ribbon too! So I tied a little bow using grosgrain ribbon (don't know why the pic is sideways...can't get it to go straight....anyone????)...


... and painted the Shimmerz directly on the top of the ribbon. Again, it didn’t take long to dry and it was ready to go on my card! Keep in mind that you don’t need to saturate your ribbon or flowers or paper. You only need a little to add some extra glimmer to your project.


I figured why not go all in?? So I decided to try painting my bland, flat looking brads with some Shimmerz too!! Here’s the before .....


.... and after! It takes a little longer to dry because it’s a smooth, non-porous finish.


And here are the finished cards, all pretty and sparkly!! Don’t forget, this stamp set is not available until the release on February 4th, but the Shimmerz are over at the store now!


I hope you enjoyed my attempt at a tutorial!! And have a very SPARKLY day!!!

Whiff of Joy Party Mouse!!


I'm off to work all day today, so it's going to be a quick post! I'd MUCH rather be home stamping!

Today's card features THE cutest stamp from the new Whiff of Joy Party Animal release!! His name is Henry the Celebrating Mouse!

I stamped him and coloured him with my Copics and then cut him out and embossed him using my new Pinking Circle Nesties. The card base is Brocade Blue with Certainly Celery for matting, dp by We R Memorykeepers and a strip of Pumpkin Pie across the middle. The sentiment from CCDesigns is stamped on So Saffron and punched out with my oval punch. I added some brads at the top and pop dotted everything!


Okay, now since *you* and I are so close...I mean, we're stampin' sistahs, right?? Well, I'll share with you that my guilty pleasures are reality shows. Right now I'm addicted to The Bachelor....anyone else??? Did you watch it last night and are you so proud of Jason for getting rid of those three girls?? What a stand-up guy! Have you got your favourites picked?? I do!! I'm a big fan of Jillian (she's Canadian, ya know!) and Melissa.

Have a great day ladies!!! I know I will.....try.

Is there anything better than a Stampin' Friend???


WARNING: This is a rather long post about stamp shopping with lots of cute little anecdotes and a few fun pictures! If you are averse to any of these things, you may wanna skip today's post. Oh come on, you wanna read it....ya know ya do!!!


Kay, so I told ya how my pal Andrea and I had a morning of stamp shopping planned for Saturday, right???

The plan was:

- meet at Scrappin' Great Deals at 9am
- leave Andrea's car there and drive to Petrolia to The Town Scrapper- spend $$ on wonderful new rubber!
- drive back to London and meet my parents, who are coming all the way from Wallaceburg, at Michaels
- use coupons and spend $$
- take Mom with us to Scrappin' Great Deals, see Sheila and spend more $$
- part ways with Andrea, Mom and Dad come to my house for the afternoon to visit, play games, eat, etc.

Okay well, when I got on the 402 to go to SGD in Kilworth, the highway was a snowin' blowin' mess! It was overcast and whiteout conditions and I was a tad scared. I got to SGD, called the parents, told them not to chance it and called my honey and told him I think I'll just stay in town this time. What's with this weather always blowin' my plans all to....well, never mind.

So Andrea arrived (with two made-from-scratch cinnamon buns, complete with cream cheese frosting made by her wonderful hubby, Jason) and I told her what the highway was like. Obviously we didn't want to risk our lives for stamps......wait a minute, did I just say that??

Anyway, it was 9am and the only crafty store that would be open was Michaels, so off we went. The roads were snow covered and slippery even in town, so we took our time (*code for yakkin' and chattin' it up all the way.....not to mention laughin' and snortin'*)

We were shopping around Michaels with our Timmy's coffee and tea in hand, picking up some deals from the dollar bins and trying to decide what to use our 40% off coupons on. Well, we found some wonderful shaped chipboard books in the $ bins! I got a heart one, a butterfly one, a scalloped square one. There was also some nice ribbon that we picked up. Anyway, we were talking about what to buy with our coupon when Andrea pointed out a storage system that she had been eyeing. It's called the Grab n' Go and it is for storing all our little buttons and brads and charms and such. It's got four cases in it with little dividers and it's just too cute for words. Andrea even did a little play in the middle of the store where she was walking up the street (actually the aisle) to my house with her handy dandy little carrying case, coming over to play. Well, then another shopper in the store reminded me that they have been giving out coupons with your receipts the last few weeks that were more than the regular flyer coupons, so I ran out to my car to check my purse for old receipts. (I only had my wallet with me in my reusable canvas bag...I'm trying to go green....well pink and black actually because it's my MFT bag.)

Well, when I came back in the store and handed a 50% off coupon to Andrea....I'll be honest, I thought she was gonna kiss me!! So we EACH got a Grab n' Go and only paid half price!!! SCORE!!

So then, we decided that since the day had been rearranged and my parent's couldn't come down for a visit, that Andrea should come and play at my house, after the shopping of course! So we went through the Tim Horton's drive-thru to get her husband a coffee (to butter him up) and went over to her house. She took me down to her craft room which is an entire giant room in her basement!! It's more than twice the size of my tiny spare bedroom craft room! So she starts packin' all her Copics and stuff up and I say, 'Um Andrea, don't you think you'd better ask Jason if you can come?? I mean, you're leaving him with the kids all day....with two sleepover friends....again!' (You may recall she did the same thing when she came over to play two weekends ago.) Now, I'm not saying what else she bribed the poor man with, but I was left sitting in the basement for a long few minutes. That's all I'm sayin'! *JUST KIDDING*

So we said cheerio to the Murdock family (the kids barely noticed us come in or leave) and we took off again. We went to the Michaels on the other side of town to use our 40% off coupons...couldnt' let them go to waste, now could we?? THEN, we headed back to Kilworth to Scrappin' Great Deals!!!


Well, I gotta tell ya....I'm always amazed at how busy that place is! I mean, I know of quite a few brick and mortar scrapbooking stores in the area that have closed over the last few years, but SGD is always a rockin'! As soon as you walk in the door, it's just a feast for the eyes!!!


So much beautiful patterned paper....


...and Primas and stamps.....


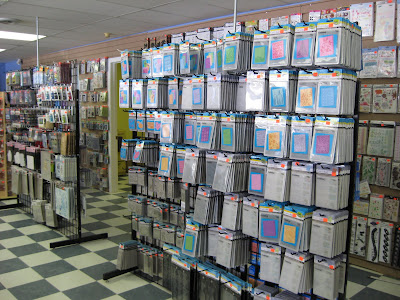
....and Cuttlebugs and Nesties...oh my!!!

We go in and a SUPER nice lady comes up and introduces herself to us! Her name is Kim too and she is on the Design Team for the store. She is super tall, super slim and SUPER nice!! Another nice gal, Angie was there teaching a class as well, so I got to meet her too! The fun thing is that these girls will be coming to the Copic Certification class in March too!!! We are going to get into SO much trouble!!!


Here's a lovely pic of the two statuesque beauties. Oh and Angie is a hairdresser too....I'm gonna hafta go to that girl!

Then of course we chatted with the wonderful Sheila...honestly she is just the nicest, most generous gal! (Plus she puts up with the over-the-top, rubber obssessive, drama queens that are Andrea and I and doesn't kick us out of the store when we jump up and down with excitement over the latest patterned paper and Prima flowers!) We discussed some possible classes that we might like to teach in the near future...is there anyone close by that wants to come??? We'll try not to scare you off with our enthusiasm!


Here's a great shot of her dancin' around in the middle of her store!! *giggle*

SO we shopped a bit and spent a few more $$ at SGD. OH and I have to tell you about the Kimmie and Andie Shopping Rationale. We made it up and it's gonna crack you up...but you are gonna want to use it!!

1. If it's $3 or less, it's Essentially Free!
2. If it's $6 or less, it's Practically Free!
3. If it's $20 or less, it's Almost Free!
4. If it's more than $20, it's an investment in our business and will eventually pay for itself!!


There ya go......feel free to use it!!


We shopped and shopped until we could shop no more and then we came back to my house. We set up at my kitchen table, complete with Ott-Lites and Copics and stamps and we laughed and giggled and coloured and stamped and playing with our Nesties and dies!! It was such a HOOT! She stayed until 9:30pm but honestly it felt like no time at all! And she would have stayed longer but Jason might have changed the locks on the house by the time she got home!!

So much fun.....can't wait to do it again!!!


High Hopes Challenge #15 - Hearts!!!


It's Sunday again and you know what that means!!! It's time for another happenin' High Hopes Challenge!!! This week, we are using HEARTS!! Hearts on your patterned paper, in your image, punched out hearts, hearts on your ribbon....whatever you like!! We {LOVE} Hearts!!!

My design features my favourite cupid....his name is Cupig!! How cute is that??? I stamped him on Wausau bright white cardstock using Memento Tuxedo Black ink and coloured him in with my Copic markers.

The card base is 6x6 textured Sahara Sand cardstock and the dp is from the Irresistable line by My Mind's Eye that I picked up from Phebe at The Town Scrapper. I sewed around the frame using my sewing machine and added a couple of button brads in the top corners. I used my Nestabilities to cut and emboss the main image and the Cameo Coral matting layer.

I used my Martha Stewart punches to make the little heart embellishemnt at the beginning of the sentiment layer. I used my pal Anna's fabulous habit of making the sentiment layer into a poofed out flag....love it!! I finished it off by adding some yummy vintage crocheted ribbon by Melissa Frances across the middle (I've been hoarding this beautiful stuff) and pop dotting the main layer!


Be sure to head over to the High Hopes Blog and check out the amazing samples that the girls have made for inspiration for ya!!

Also make sure you come back and see me tomorrow because I've got some great photos from my day shopping yesterday with Andrea!! It was an all day experience and we met some fabulous gals!!!

Have a great day and see you tomorrow!!!

ATS Challenge #33 - Faux Stitching!!


This week's challenge over at All That Scraps is to use faux stitching on your card! Well, I've been using my real sewing machine so much lately, that this was a great challenge for me!! I had to pull out my handy dandy Mat Pack and find my white gel pen and get to work!


I used one of the cute Gingersnap images from Hey Cupid! by CCDesigns and some Crate Paper dp. Of course I used my Copics and my Nesties and punched out some Martha Stewart hearts. The cardstock is Bazzill Bling from ATS. I finished it off by adding the faux stitching, the velvet ribbon by Crate Paper and pop dotted the main image. Oh and I made her wings all sparkly with some Shimmerz!!


Well, it's a quick post for me today because I've got a busy day planned! I'm getting up early (only for stamps would I do this on a weekend) and picking up my pal, Andrea and heading to The Town Scrapper, Michael's and Scrappin' Great Deals!!! And my parents are coming to town for a visit too!!! How fun!!

Hope you have a stampin' good Saturday too!!

My Heart's a Flutter!!

No,no!! Really....it is....I'm not just sayin' that!!! And I'll tell ya why!!

So you know I use Copic markers right?? hehe! If you've visited my blog before you KNOW this! Anyhoo, I can use them okay, not bad, but I really would LOVE to take a course on how to use them properly, new techniques etc. But all the workshops are in the US and Copic rarely comes to Canada, much less Ontario. WELL! I heard from my stampin' sistah Andrea that they are coming!!!

SO, I emailed them a couple of weeks ago and yesterday, right before I was about to head out the door to go to work, I got the email!! It came with details about the class, explaining that spaces are very limited and it is first come, first served kinda deal. Also you have to be either a store owner or an employee in the papercrafting or fine art industry, a sales rep for Copic distributors or affiliated with a company through Design Team work. So, in lightning speed, I filled out the application, attached several pics of my work and headed off to work! (I was almost late, by the way!) I knew that if I didn't send if off right away, the spaces might fill up.

WELL! On my supper break, I checked my email....and guess what???! I GOT IN!!! yahooooooo! It's not until the end of March but I am totally thrilled!! I can't wait!! I'm gonna be taking my Copic colouring to a whole 'notha level!!! Baaaaaahahahaaaa!! And the best thing is that once I take this class, I'll be certified to TEACH Copic classes!! heehee!

Anyhoo, thanks for sharing my big news!! On to today's card!!!


I have a lovely, lacey card using the L'Amour set from Lizzie Anne Designs! (Which by the way, is the product of the week!) I stamped the pretty butterfly on Wausau bright white cardstock and coloured it with my......let me hear ya say it.....COPIC MARKERS!!! hehe! The patterned paper is from the Bittersweet line by Basic Grey...mmmmmmm...and the card base is Pink Pirouette. I added a lacey border across the bottom using a Martha Stewart border punch and a couple of rhinestone brads at the top. I used my Nesties on the main layer and pop dotted it!!

Well today is my day off but I'll be up early to take Emileigh to her Biology exam this morning. Yuck....glad it's not me! Then I'm going to Andrea's tonight for a PMS night....Pyjamas, Munches and Stampin'!! Sounds like fun, right??

Hope you have a Happy Friday too!!

I'm Totally Diggin' You!!


Yesterday was the release of the Paper Doll Sayings stamp set that I showed you and MFT also released a new BCDzyns stamp set called Heartbreaker!!! And here she is!!

I love this girl and her short and sassy haircut! I think I want my hair like that again. What do you think? Should I chop it all off???

Anyhoo, I used this week's MFT Sketch Challenge #65 for this card. I used my yummy new Basic Grey Bittersweet papers, Close to Cocoa cardstock for the base and Pretty in Pink for matting. I stamped the main image on Wausau bright white cardstock and coloured her in with....what else?....my Copic markers. Then I stamped the image again on some of the BG pink dp and cut out just the heart. I stamped one of the awesome sentiments on it and attached it to the white piece.

I added some lovely Melissa Frances vintage crocheted ribbon and I attached my Prima hydrangeas with a BG brad and I added a filligree bead cap that I picked up at Micheals. Isn't it purty?? I pop dotted everything and added three tiny pink rhinestones under the sentiment. You like??


Well, I'm off to work again this afternoon and evening but then I'm done for a few days. I have 4 days off in a row!! Can you imagine how much stamping I'm going to do??? Heeheeeeeee!

Have a super inky day!!

Related Posts Plugin for WordPress, Blogger...